By Guest Blogger Taylor Hansen from Hansens On The Hustle
Let me preface this blog post with how I am in no way a Cricut expert. I’m actually VERY far from it. I have spent countless hours trying to figure out the ins & outs of this nifty little machine. YouTube is my best friend.
I was gifted my first Cricut (an OG – “The Cricut Create”) in college, a time where I made a scrapbook for EVERY SINGLE EVENT that happened in my life. Fast forward to two years ago when I was gifted my Cricut Explore Air 2 (UPGRADE). I was overwhelmed with all the possibilities this machine could do. I know I’m not the only mom out there that all the sudden wants a vinyl label on every item. I had so many ideas, which I ended up doing absolutely NOTHING with.
As my son’s 1st birthday rapidly approached, I figured – what a great time to get some use out of my new machine, because 1st birthday parties are definitely not a big deal and very low-stress … NOT! Keep on scrolling to make your DIY process via Cricut as painless as possible:
Before you start cutting & designing, be sure to go through the following steps to solidify your Cricut cutting plan:
1. Choose your theme and find vectors that you wish to use:
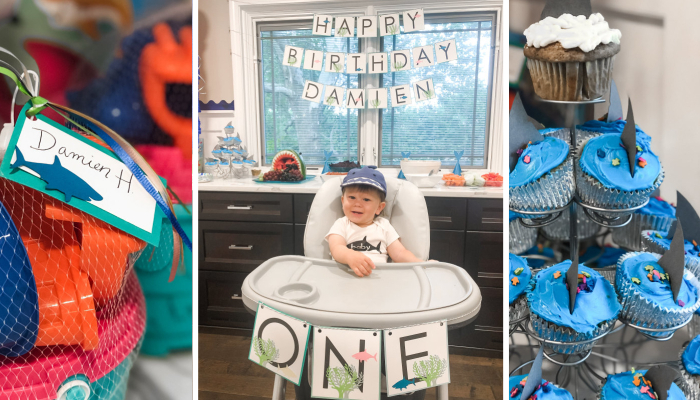
We called our son our “baby shark”. It was a breastfeeding joke between my husband and myself – ouch. We didn’t know about the “Baby Shark” song until months after we had established this nickname (I sure hope mentioning the song didn’t get it stuck in your head now – I apologize in advance).
How to pick your vectors:
– Search via google for free vectors & then import them into Cricut.
I didn’t want to use the actual “Baby Shark” characters. I wanted to create my own to have his party be a bit more unique and less “character” driven. I found free vectors by searching on Google. It can be very time consuming to find a vector with no watermarks, but can save you money and give you a bit more creative freedom. Cricut also has A TON of vectors & images to choose from. Some free, some not.
How to import your own vectors:
– Start a “New Project” in Cricut Design Space then there is an icon on the left-hand side at the bottom – “Upload”.
– You have the option to upload an image or a pattern fill. Click “Upload Image” and add the file of your downloaded vector.
– Follow along with the continued steps to make the background transparent (Sometimes vectors that come with an already transparent background do not upload well in the Cricut Design Space. I try to stick to vectors with a solid background instead).
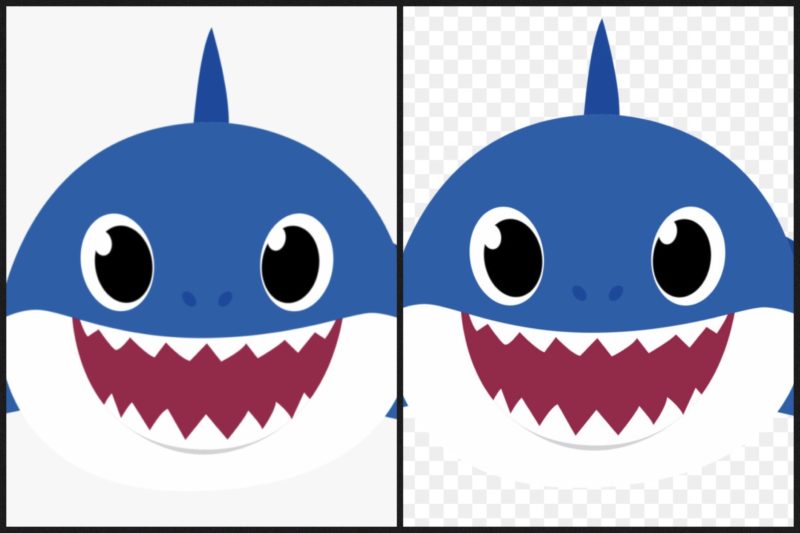
– In the final step you’ll need to save it as a “Print Then Cut” image or “Cut Image”.
“Print Then Cut” image means you will print the image on the cardstock first using your regular printer and then put it into your Cricut to be cut out. This is a great option if you wish to print a specific character for your theme, this will allow you to print them but not have to hand-cut them out. “Cut” Image means it will just be the shape, I suggest using this method if you are just wanting a basic shape in a solid color. (I did this for my son’s party and created a shark, shark fin and seaweed vectors.)
2. Choose your color scheme and try to only use these colors:
I played off the colors of the original “Baby Shark” characters, which was perfect because they were easy to find in cardstock colors. I would highly suggest going to Joann’s, Michaels or Hobby Lobby before picking your color scheme. Then you can base it on the pre-packaged cardstock packs. You can even get lucky and the 8 x 10 packs 3 for $10.00 (this worked out for us!)
3. Choose your font and STICK TO IT.
This will help your party look cohesive. Cricut has tons of fonts to choose from for free. You can even do a trial for their Cricut Access if you want a fancier font, but make sure you cancel your subscription if you don’t wish to use it past the free trial phase. (I may or may not be still paying for it every month…hahaha!)
Customized Font Hack – I download free fonts from www.dafont.com.
4. Break out the Cricut
Okay now that you have solidified your theme & design ideas, let’s BREAK OUT THAT CRICUT (cue cracking of the knuckles and pouring of the wine).
Below is a list of 1st birthday décor that I easily made with my Cricut. These quick how-tos and tips will make your party planning life a breeze.
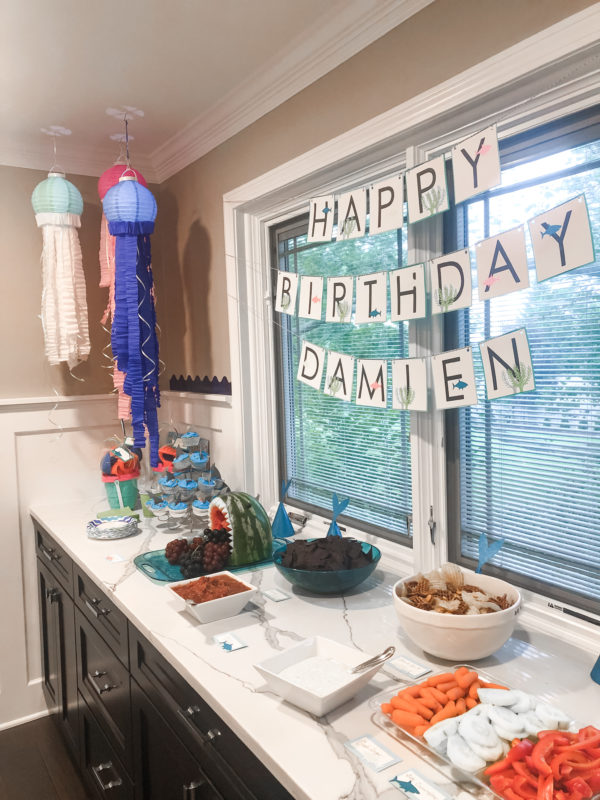
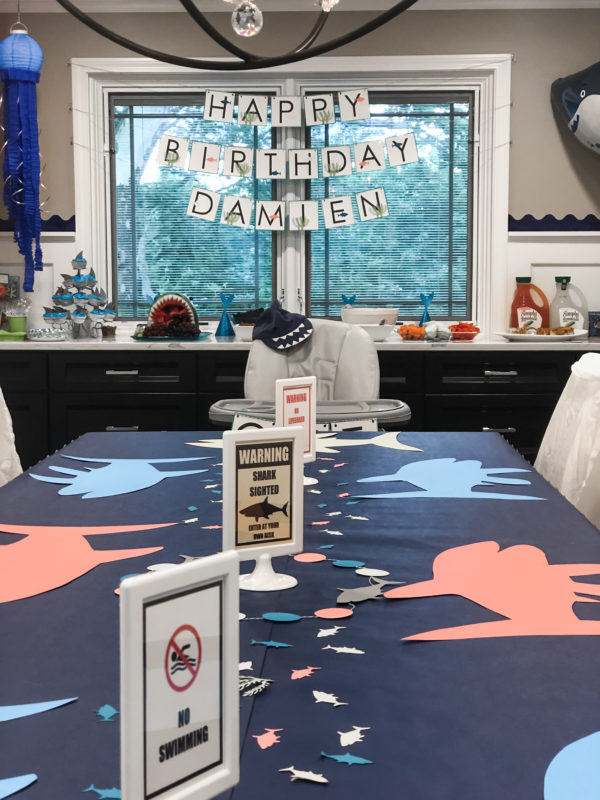
Happy Birthday Banner
– Decide how long you want your banner, then decipher the size of each piece of your banner from there. I made ours in 5 x 5 squares. Cricut has lots of banner templates if you wish to choose a different shape.
– Cut out the banner base. The more layers the better, I alternated between three shades of blue as the base then had a white piece of cardstock layered on top. This made my “Happy Birthday” letters & fun decals pop.
– Cut letters out with Cricut & glue to banner pieces (I suggest making the letters one to two inches smaller than your banner pieces & using a glue stick instead of liquid glue).
– Add small versions of your vectors throughout the banner to tie it all in. (I made one to three-inch versions of my sharks & seaweed in my color scheme).
– Use a hole punch to make holes to thread a string or ribbon through to hang. Tie small knots to secure to banner pieces in place, if you don’t knot them they will all slide to the center and bunch when you go to hang it up.
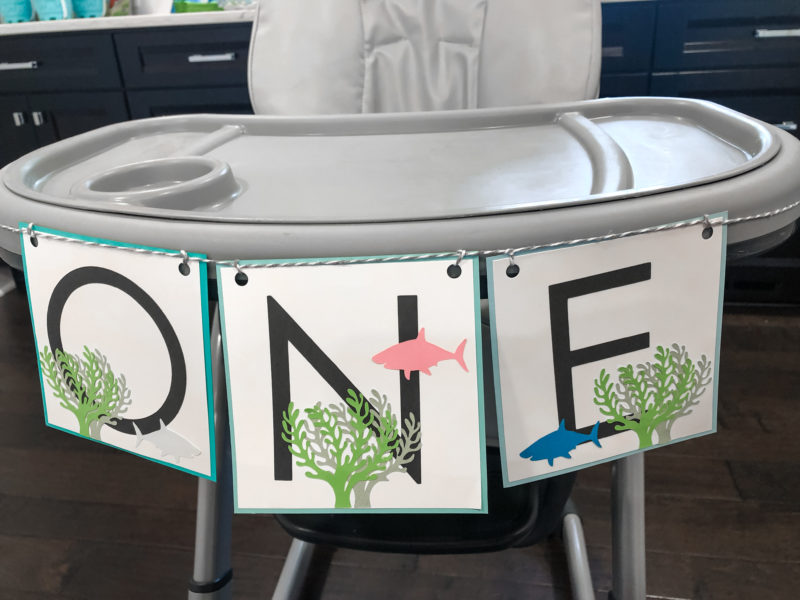
Highchair Décor
– Repeat the same steps from the Happy Birthday Banner.
Streamers
– I made my own streamers using the shark vector I imported and a basic circle.
– Cut out your vectors, for streamers they should be anywhere between three to five inches.
– You will need to pair two pieces together (front & back) with the string or ribbon going through the center (I did not do this, so when I hung my steamers they naturally spun so you could see my tape job…THE HORROR!!)
– Using Tape, secure the first piece to the string or ribbon, then glue the second piece on top to line up with the other piece.
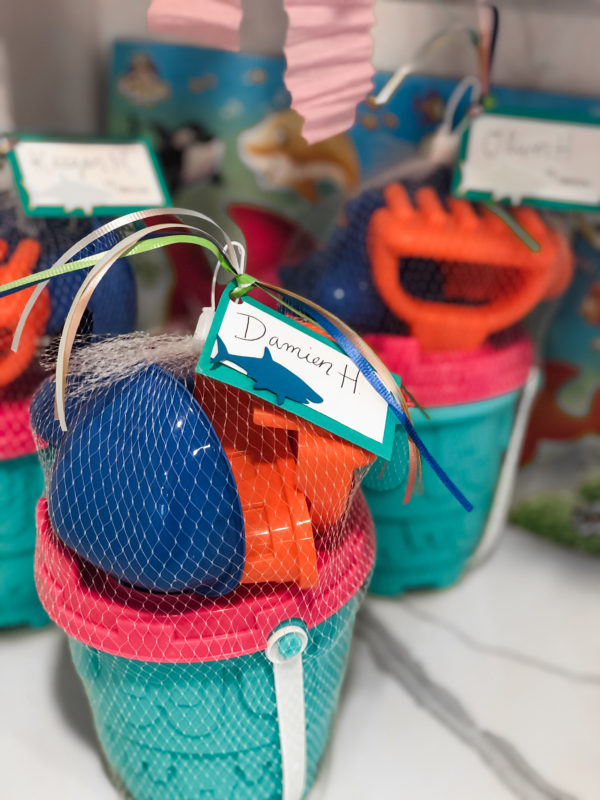
Food Labels & Goodie Bag Tags
– Cut out a colored base & a white background piece to layer on top.
– Glue together.
– Add a small version of your themed vectors (approx. 1-2 inches big) to the corner.
– Handwrite your food items or “thank you” on the white cardstock.
– For food labels, tape to a toothpick and place in food (I didn’t have toothpicks on hand so I just laid them down in front of the assigned dishes).
– For Goodie Bag Tags punch a hole in the side and use ribbon to attach it to your gifts.
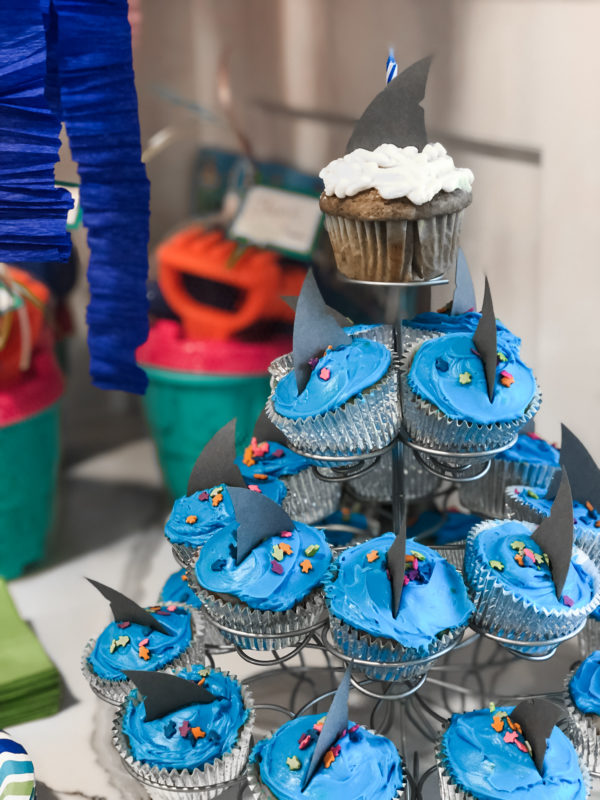
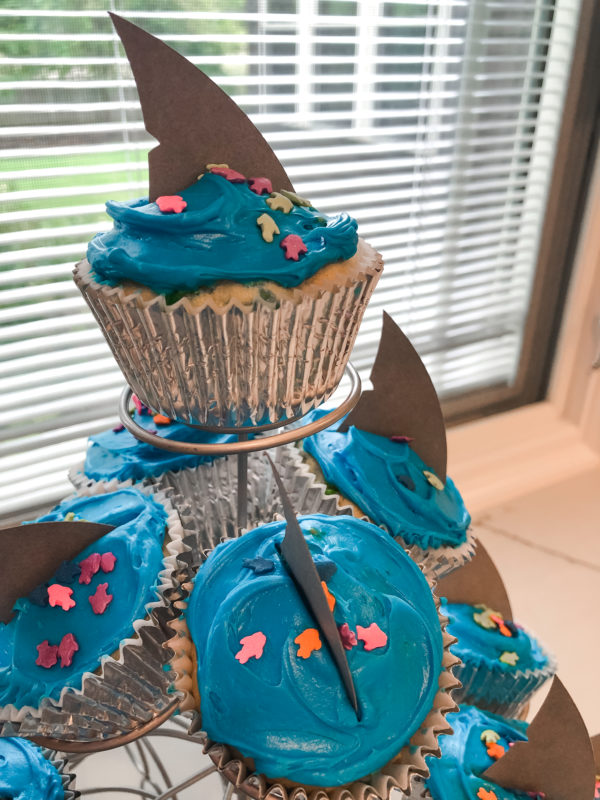
Cupcake or Cake Toppers
– I used my Cricut to cut out shark fins to put on the top of our cupcakes. The fins didn’t need to be added to toothpicks, since they were meant to come directly out of the water, thank goodness, because as I mentioned, we were fresh out of toothpicks.
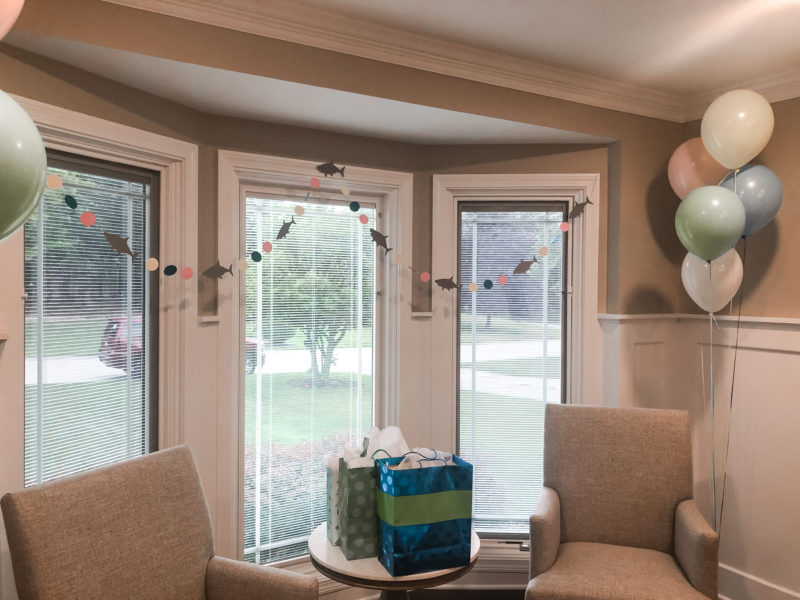
Confetti
– Cut out tiny versions of your vectors in multiple colors and use as confetti on your tables (I recommend ½ to 1 inch big).
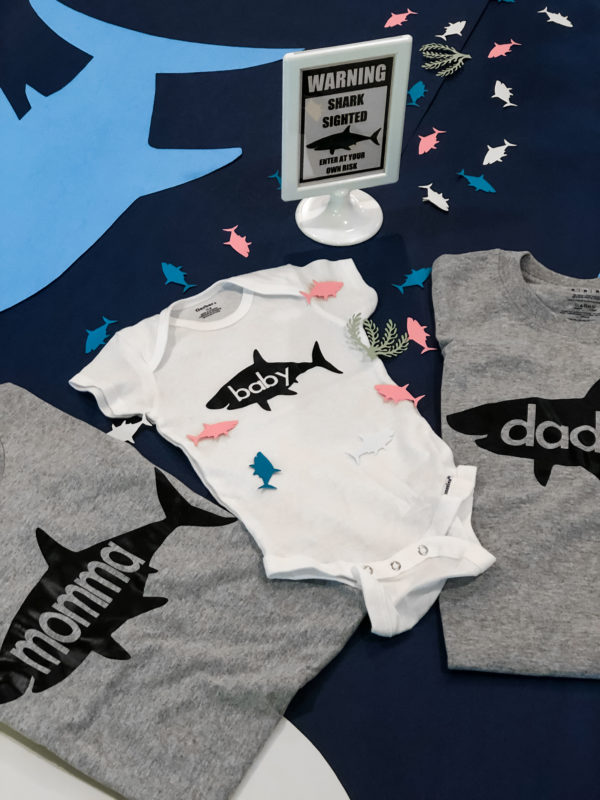
Family T-Shirts
– Purchase Cricut “Everyday Iron-On” of your choice (there are also other brands on amazon that are great as well).
– Joann’s, Michael’s & Hobby Lobby sell a few different brands of shirts & onesies, most of the time they are on sale for 2 for $15. Amazon also sells the same brands, usually for a lower price but you have to be patient and wait the two days for Prime shipping 😉
– In Cricut Design Space you can create your shirt! Many how-to boards suggest a “set size” for iron-on decals based on size of shirt or age, but I highly suggest “cricutting” your decal on cardstock first and sizing it to the shirt physically on your body before cutting the “Everyday Iron-On.” We used the same shark vector from our decorations to tie it all in together!
– One of the most popular decals right now is a shape with the letters cut out of the middle. This is a semi-complicated process, but once you do it once, you never forget (this is a total lie, I have to watch the video every single time). HERE is the video I watch to do this.
– Once your design is ready, follow the instructions given with the “Everyday Iron-On” for the actual cutting process (Reminder – try it with cardstock FIRST!!!! The “Everyday Iron-On is semi-expensive and comes in small sheets, you don’t want to mess up and waste!!!
I had an absolute blast using my Cricut machine to create all these fun details for my son’s 1st birthday party. As I kept designing and cutting the ideas kept coming, however eventually I had to STOP and PUT THE CARDSTOCK DOWN (Aka my husband said, ENOUGH!!). We could have easily just done the party with these DIY items, but we added a few more touches to complete the full look (My mother got in on the DIY fun as well).
5. Other Final Touches
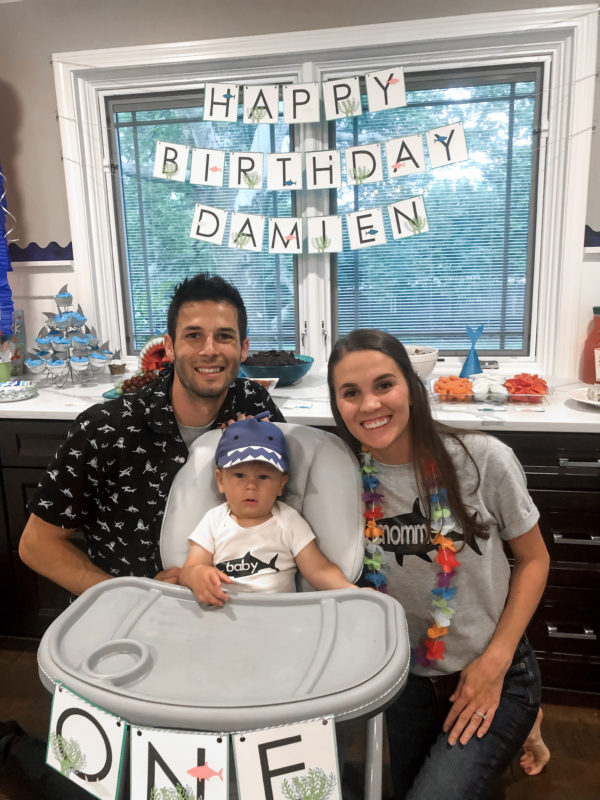
Dress Code – I am a big fan of themed outfits. It truly makes a party TOP OF THE LINE. For our son’s party we did “Hawaiian” theme for dress. Who doesn’t love to bring out those fun floral prints? Outfits alone can be enough decoration!
Balloons – we did little clusters in the colors that matched our little sharks and got one large shark balloon to accent at the buffet (HUGE hit with our son).
Themed Food & Cake
We served Sushi (too clever right?) as our main appetizer and then we picked snacks that would pass as fun ocean-themed items. (Ex: sliced bell peppers to dip in hummus but labeled them as “Octopus Arms”) We were SO lucky the Pillsbury Funfetti cake theme on hand was a perfect match!!! Blue icing & fish sprinkles! Check out the shark jaw made from a watermelon!
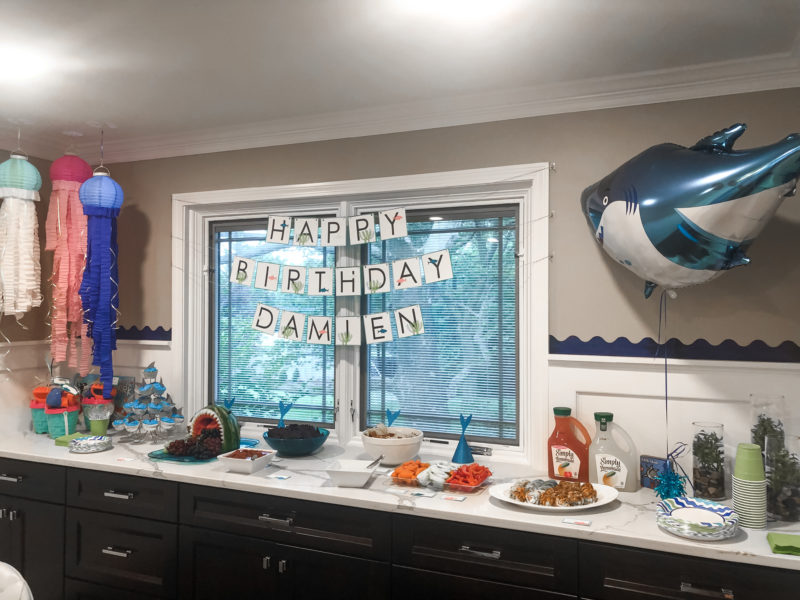
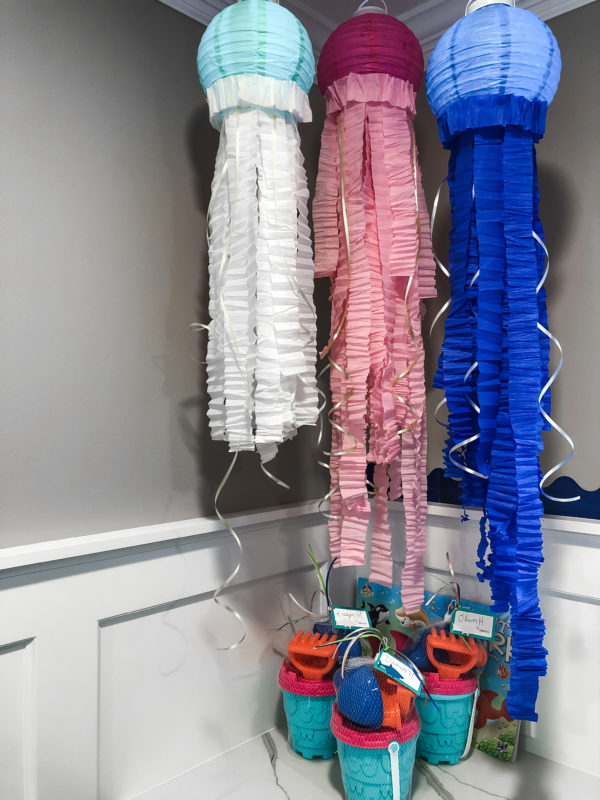
Paper-lantern Jellyfishes
These were made from paper-lanterns from the dollar store, streamers and curling ribbon!
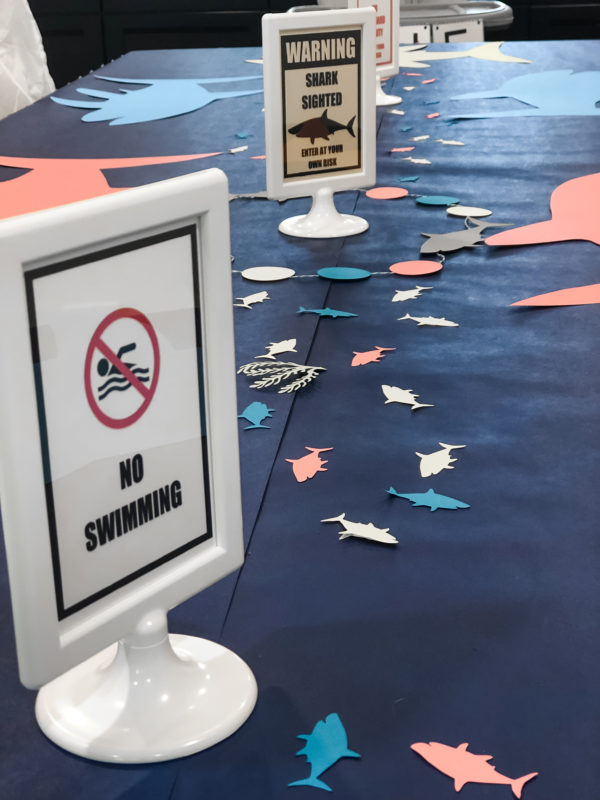
Beach signs & Placemats
I made print outs of signs you would find at the beach in Microsoft Word. We then made large versions of our shark vectors out of poster-board in the coordinating colors.
I hope this inspires you to break out that Cricut collecting dust in your craft closet. It truly is a user-friendly machine (once you figure out how to use it haha) and can totally give your next party a personal touch. When you get lost the in Cricut Design Space process take a deep breath, pour another glass of wine and pull up YouTube tutorials – it always gets me through.
Want to see more blogs like this and get notifications on local events and happenings? Subscribe to Triad Moms on Main’s free weekly newsletters here.