By Guest Blogger Lindsay Deibler
Do you start to sweat when your children say they want to decorate a gingerbread house? Do you run from the kits that are always located at children’s eye level in stores? Or think, “yes let’s purchase one” and cringe after starting in on the directions? Look no further— help is on the way!
Follow along and hopefully you find some helpful tips to make that cherished time more special with your little ones.
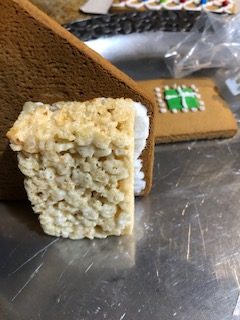
**First Tip: before constructing a ready-made kit purchase Rice Krispy treat snacks or make your own- you will use for assembly to make your life so much easier**
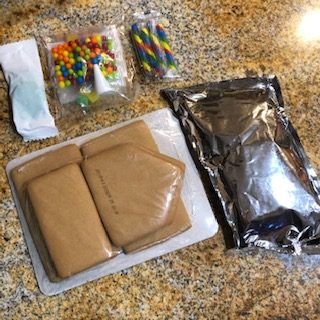
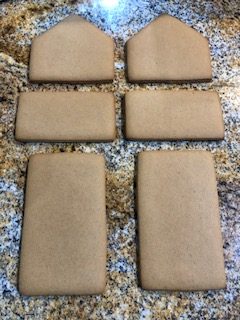
We purchased the “Wilton Ready to Build Gingerbread House Kit.” This kit includes 6 pieces of already baked gingerbread – how magical—no mess 🙂
**Family Tip: Start this project before a meal and or nap. You will need to allow some time between decorating and assembly of your gingerbread house. Decorate, go eat and or nap, then come back and assemble. Great to do in two parts in a day and even better for little ones’ attention spans.
1. I read the instructions that Wilton provided and I threw them to the wind. I am going to suggest more kid- friendly tips to approach this holiday tradition. Their first step mentions using a ruler and knife to straighten the edges. Not a necessary step unless your kit looks completely misshaped. If you are an adult building this and want your edges perfect then do not use a knife, as this could crack your gingerbread. Gingerbread artists use microplaners, sandpaper, or nail files instead. In most cases your gingerbread kit should be ready to decorate and have some fun!
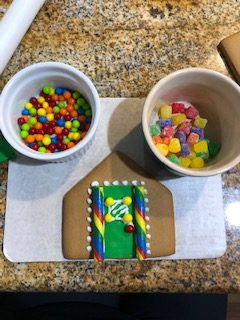
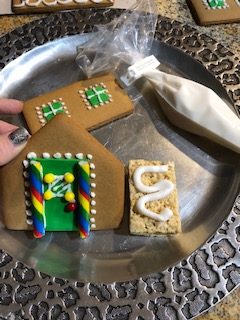
2. When you unwrap the baked pieces go ahead and place them on a cookie sheet, one with an edge all the way around if possible. You are now set up for success when time comes to decorate. This will help with any loose candy/sprinkles that don’t make it on your gingerbread and make for an easier clean-up.
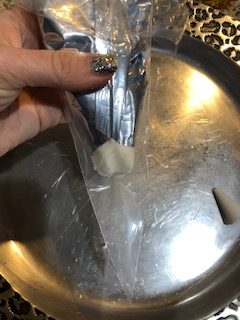
3. Time to fill your piping bag. it is the clear bag; use the royal icing from the silver bag to fill it. Do not overfill, you can add more later. I suggest you use a small clip, rubber band or twist tie at the end of your bag so icing does not squeeze out of the top of your piping bag. In the kit a white piping tip is provided and while piping tips are great for experienced bakers, they may cause icing to squeeze out the sides because a coupler is not provided. Make a small cut at the tip of the piping bag, making a small hole, which works great!! Start with a small cut and use the royal icing like glue to attach your candies.

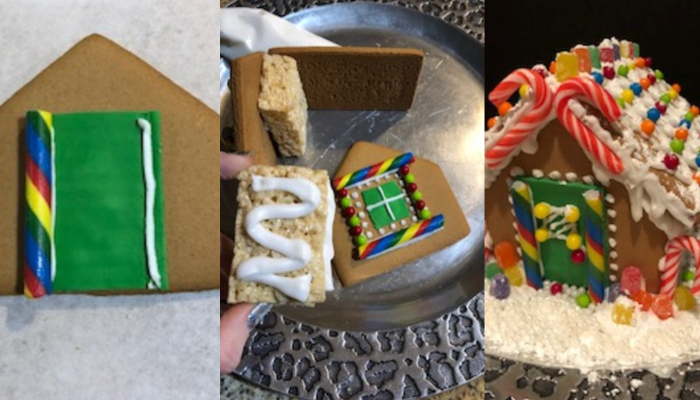
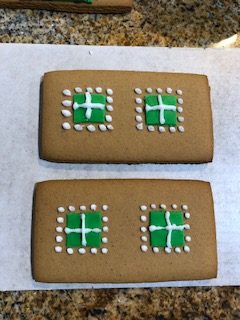
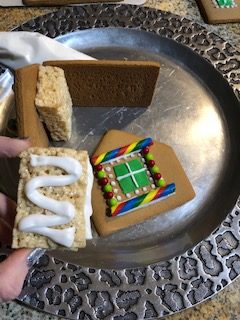
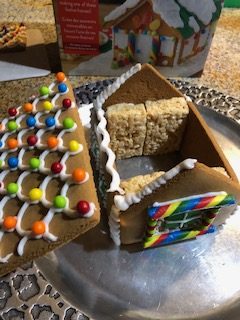
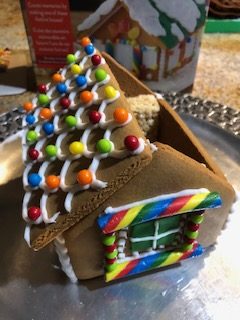
4. Time for fun – the decorating! DO NOT, I repeat, DO NOT, assemble your house before embellishments are added. Decorate your 6 pieces of gingerbread as you chose first. The gumdrops and colorful candies provided should be removed from the bags and put in small bowls for children to easily grab. Add other candies you may have at home and be creatively carefree. Use your royal icing to attach the candies provided or any you may have to add. This is your time to be creative and free of rules!! Though try to not overload your two roof pieces as this may cause problems later at assembly.
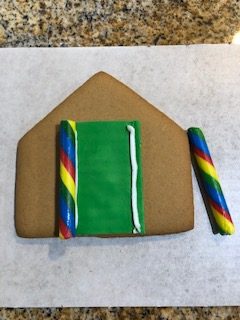
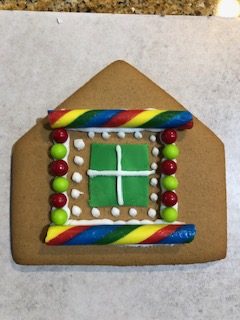
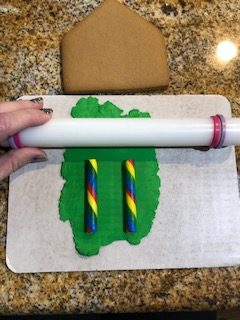
5. This particular Wilton kit includes a small bag of green fondant. Fondant can easily be rolled out with a small rolling pin and cut with a butter knife. You can even use small cookie cutters to create your shapes or playdough tools. Decorate and leave it all to rest for at least an hour. You will be able to touch the royal icing to see if fully cured.
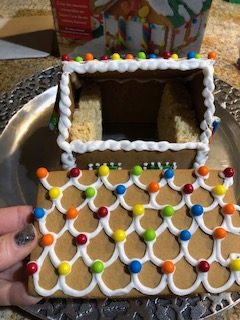
6. When you unwrapped your gingerbread pieces there was a piece of cardboard that they suggest using as a base to assemble your house on. I would plan ahead and assemble on a fun platter or decorative plate.
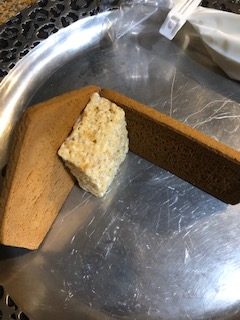
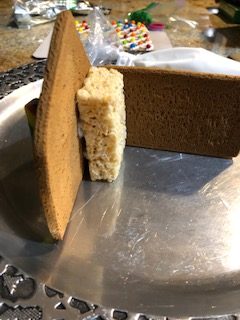
7. Time to assemble and see your creation come to life. Get your Rice Krispy treats ready! You can cut a slightly larger hole at the end of your piping bag of royal icing. Put royal icing on the front side of a rice krispy treat and one side that the side will adhere to. Put some royal icing on the gingerbread as well and stick a front wall and side together. Magic! Both walls should be able to stand on their own. You can pipe some royal icing on to your base and place the front wall on it for extra support. Do the same with the rice krispy treats/royal icing until all four walls are assembled. No cans holding up the sides required.
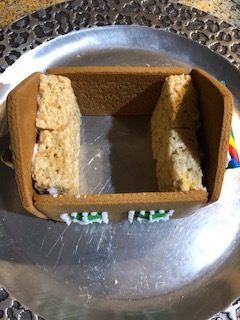
8. Ideally you should wait again for the four walls to dry before attaching the two roof pieces. Your piece should be sturdy enough though without waiting to apply royal icing and attach the two roof pieces.
**Tip** after you apply some royal icing to the base before attaching a roof piece, wait a few minutes for the royal icing to dry just a tad. If your royal icing is too warm from your handling it, it may be too warm to attach the roof piece and it will slide off the base.
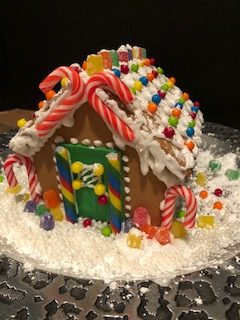
9. Add some royal icing to the joints and add additional candies, whatever you want!! 🙂 Sit back and enjoy your creation with your little ones!!
____________________________________________________________________
Ginger Gingerbread Lady, Lindsay Deibler, creates whimsical, imaginative, and unique gingerbread creations that go far beyond the classic gingerbread house. Located in Winston-Salem, NC she travels to compete in multiple competitions throughout the holiday season, awarding her multiple accolades as well as the recent donation of a house to the Cheers event supporting Wake Forest Brenner Childrens’ Hospital. Follow along on her Instagram page @gingergingerbreadlady for inspiration and magic along with seeing her work. You may read future/past blog posts on her webpage: gingergingerbreadlady.com


Well, a gingerbread house has always been a pickle for me. And now when I have kids I just can’t avoid this anymore 🙂 Have to put all of my efforts and create a masterpiece. I’m really grateful for an illustrated guide. Seems like everyone can do it.