
Summertime Craft Ideas
By TMoM Team Member Brooke Coley
The days of summer are among us! The warm weather invites us to spend more time outdoors. During the summer months our family practices “Make It Monday”. We spend at least one hour of our day creating something new. I am forewarning you now that I am a big fan of the fun & messy crafts. I wasn’t always that way. But, I have come to see that kids learn best through exploration that ignites all of their senses. We find nature truly inspires our creative process.
We have shared three craft ideas for summertime! You can take these ideas and run with them. Make it your own! You can modify each activity to accommodate kids of any age. We kept the supply lists super simple to make it a little easier on the mamas :).
3 Fun Summertime Craft Ideas
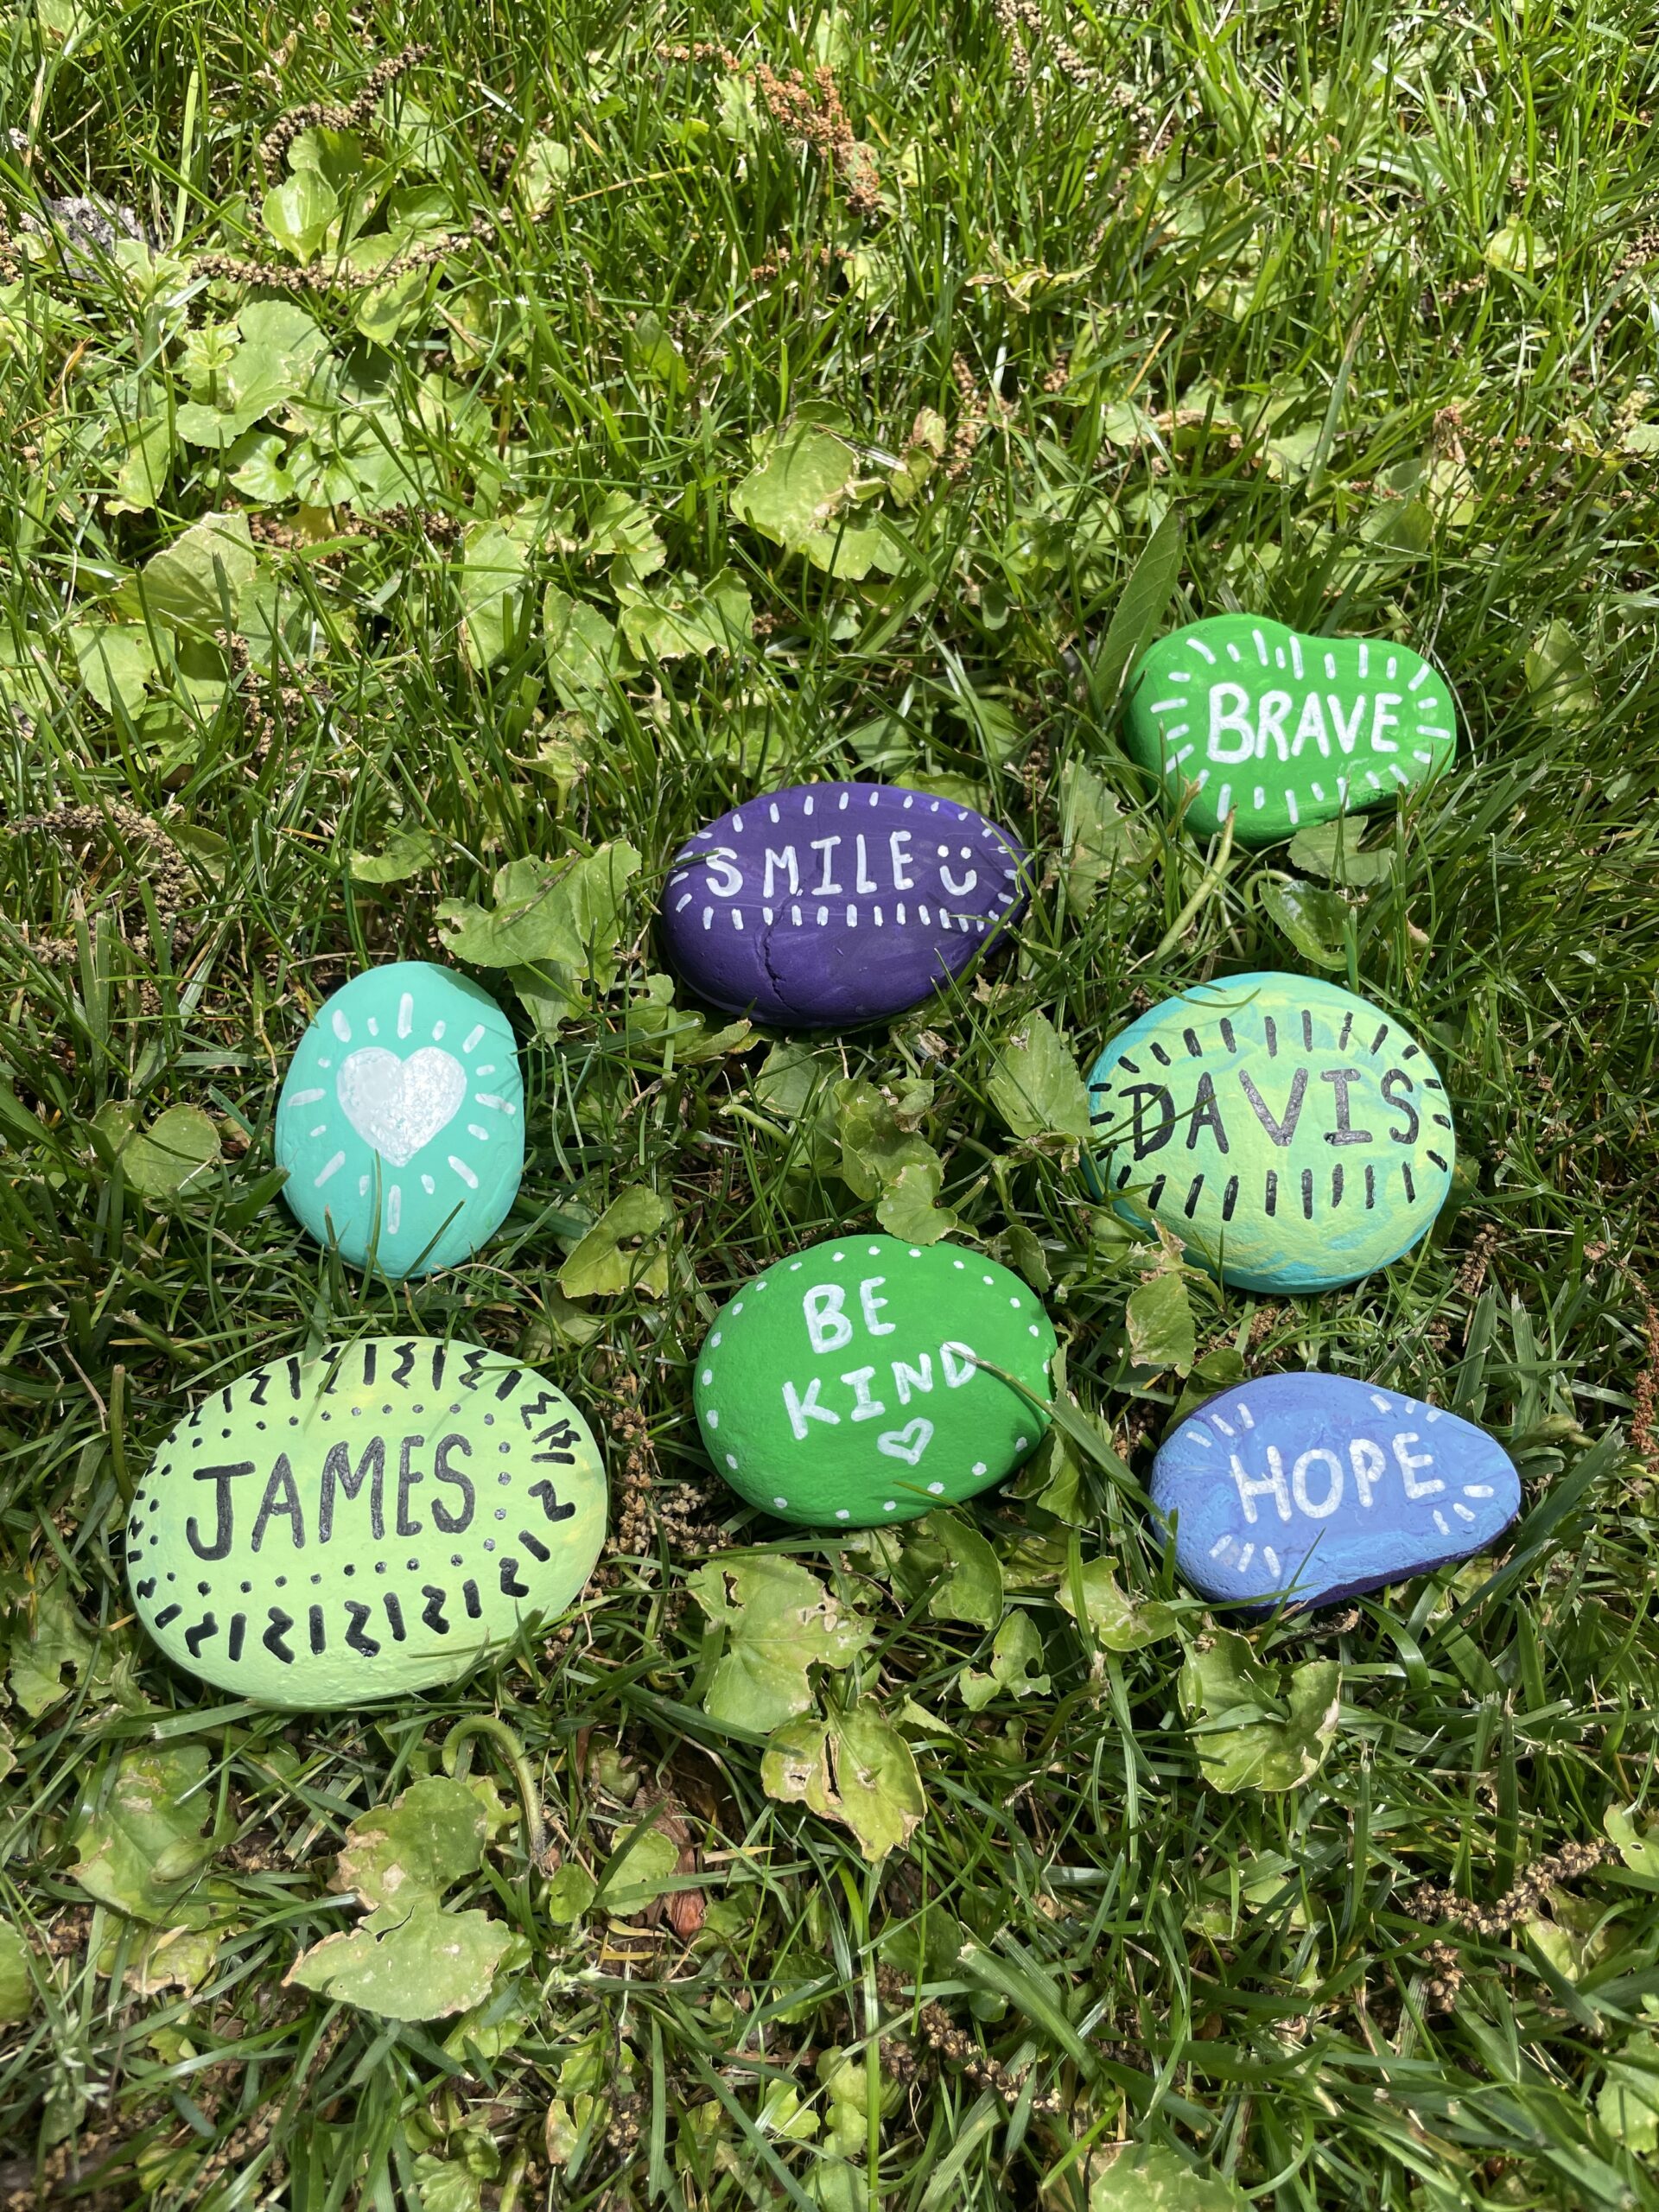
Inspirational Rocks
Supplies:
- rocks-smooth texture is best
- acrylic paint
- paint brushes
- paint pens
Directions:
- First, wash & dry rocks
- Then, set up creation station outside
- Paint the top & sides of rocks
- Let them dry for about an hour
- Flip rocks over & paint the bottom
- Let them dry for about an hour
- Apply second coat to the top & sides of rocks
- Let them dry for about an hour
- Apply second coat to bottom of rocks
- Let them dry for about an hour
- Finally, write inspiring words, phrases, names, or symbols with paint pens
- Gift to a neighbor, leave at your neighborhood park, or create a rock garden in your yard!
Tips:
- Encouraged to create outside
- Spread this project out over a few days
- Painting is a great way to practice fine motor skills
- Discuss colors and shapes throughout the experience
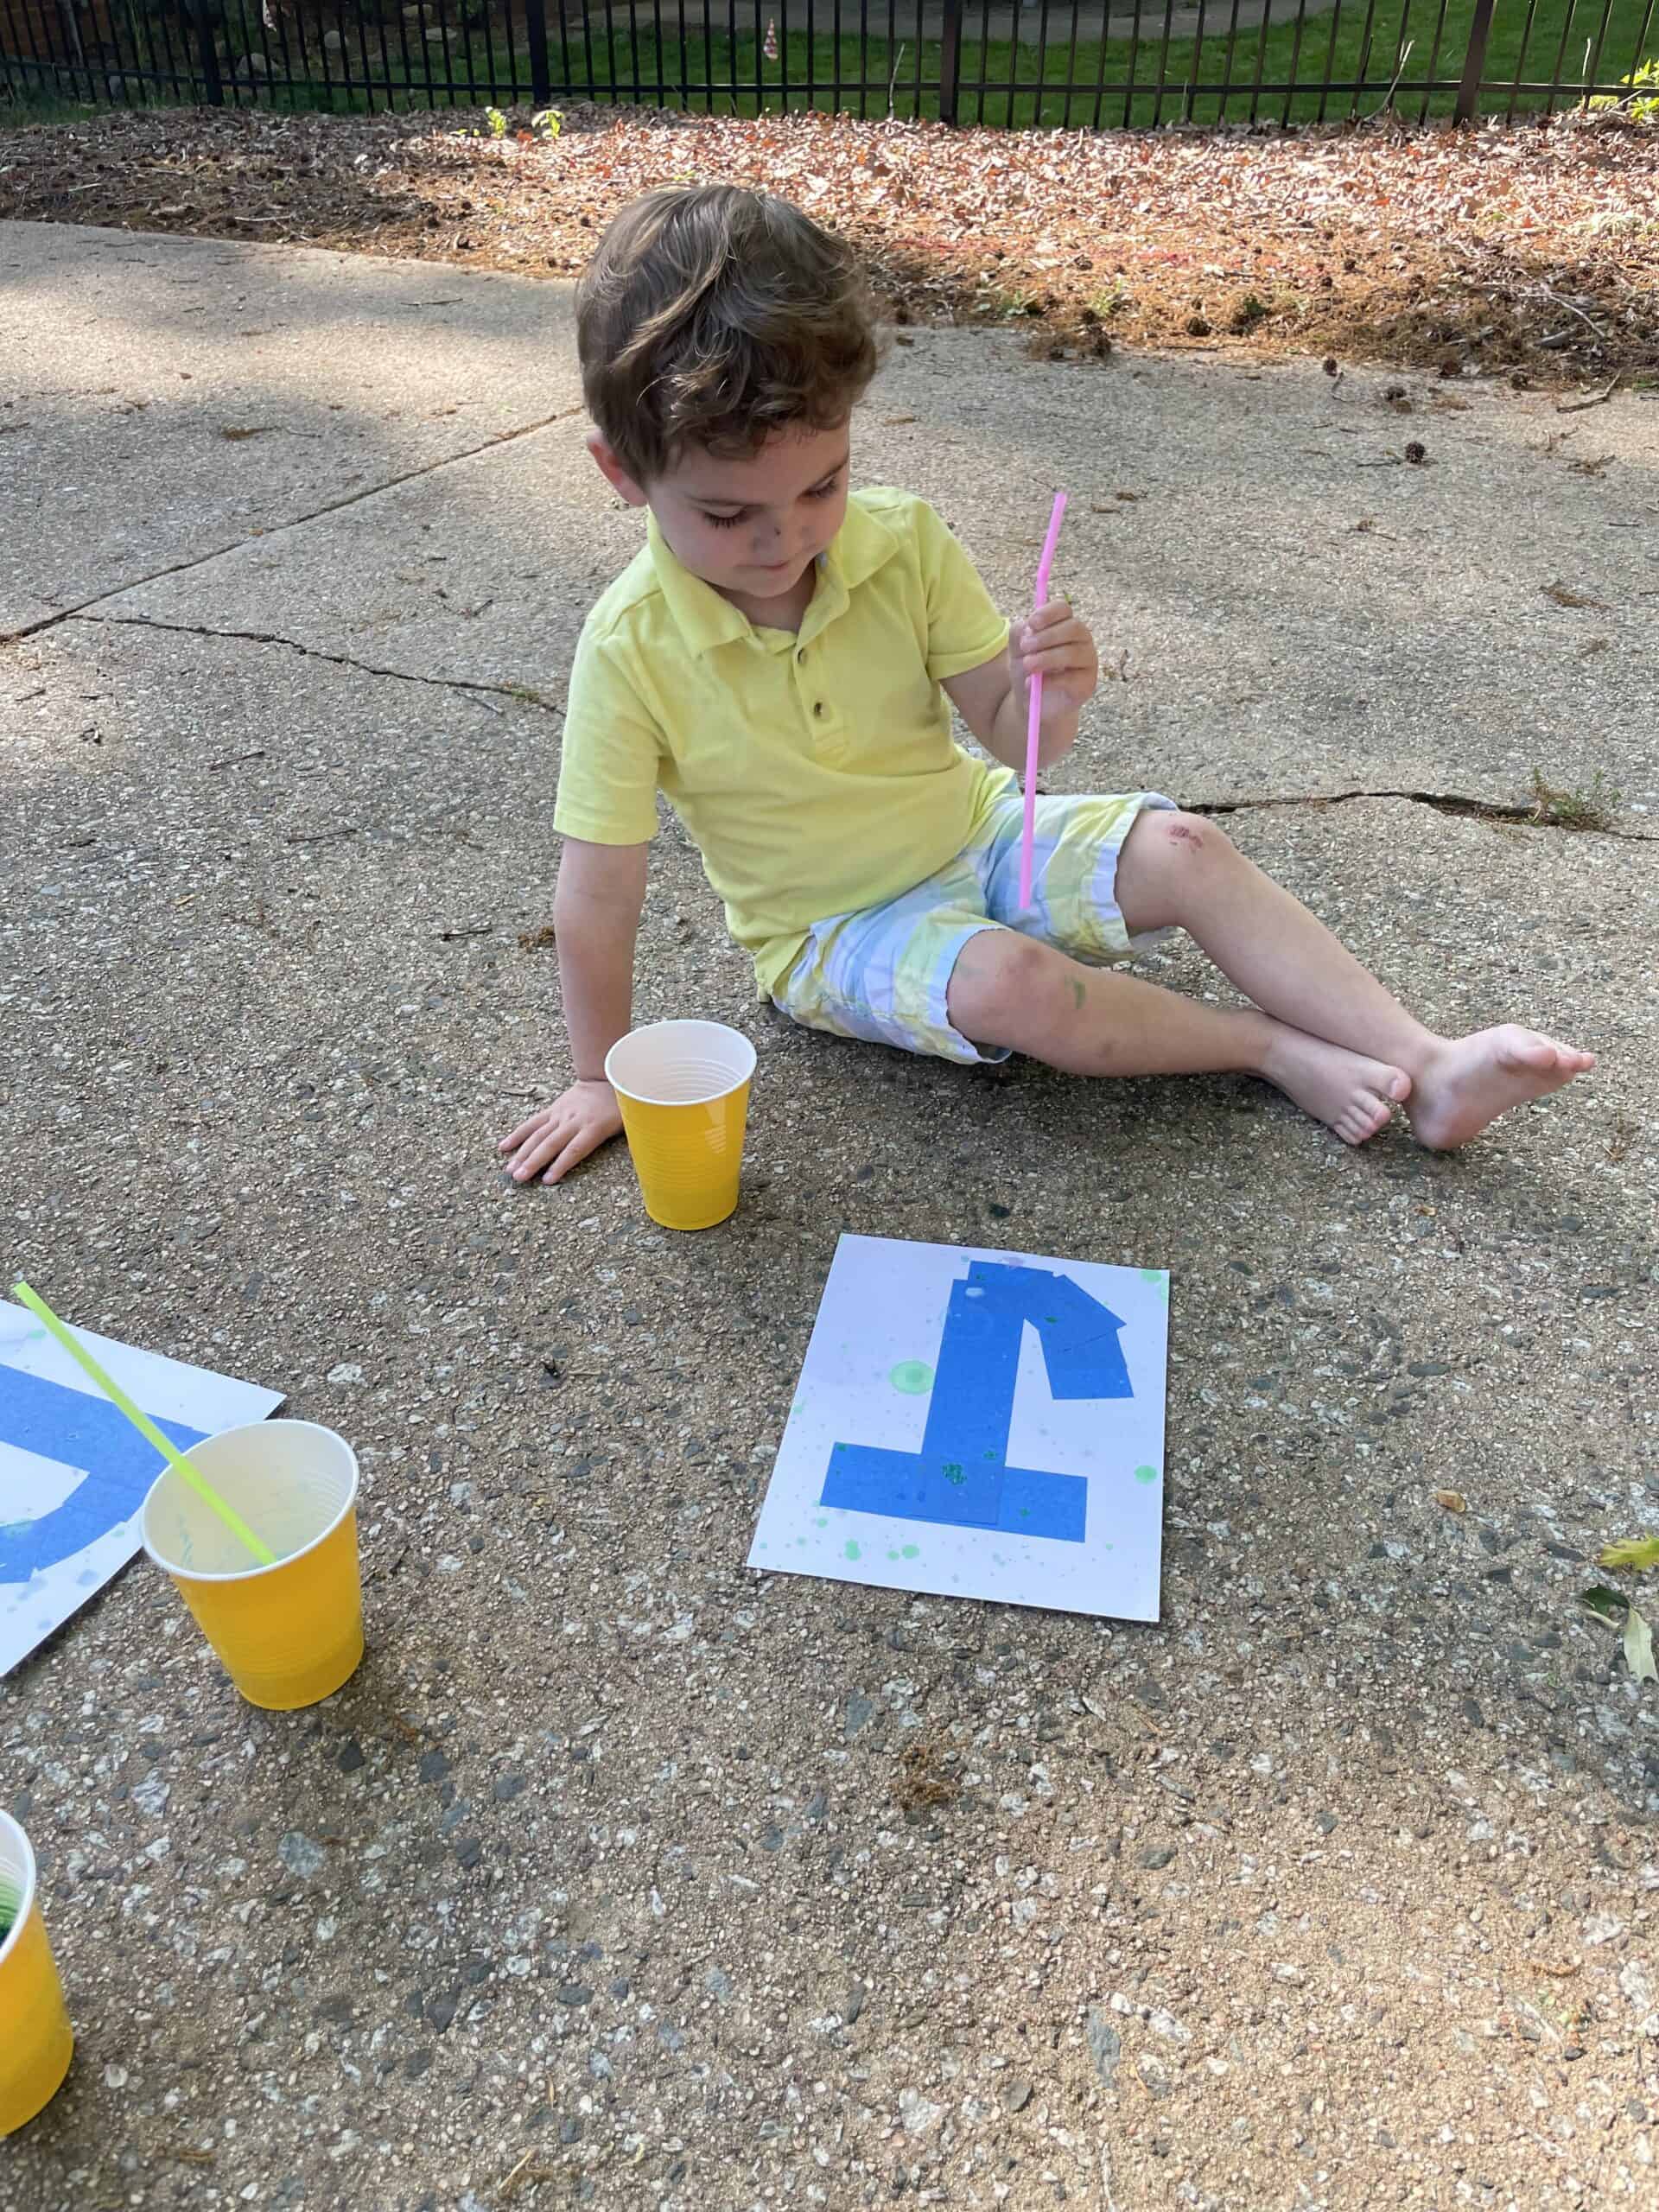
Bubble Art
Supplies:
- Bubble mix
- Food coloring
- Straws
- Cups
- White Cardstock
- Painters Tape
Directions:
- First, set up your creation station outside
- Then, pour bubble mix into 4 cups
- Squeeze a few drops of food coloring into each cup
- Mix food coloring & bubbles with a straw
- Use painters tape to create designs, letters, or numbers on cardstock
- Place straw into mixture & then blow bubbles onto cardstock
- Once you have covered most of the cardstock, let it dry outside for about an hour
- Finally, peel off painters tape
- Proudly display artwork on the fridge or in your child’s room!
Tips:
- Encouraged to create outside
- Practice letters & numbers throughout the activity
- Discuss mixing two primary colors to make a secondary color while crafting
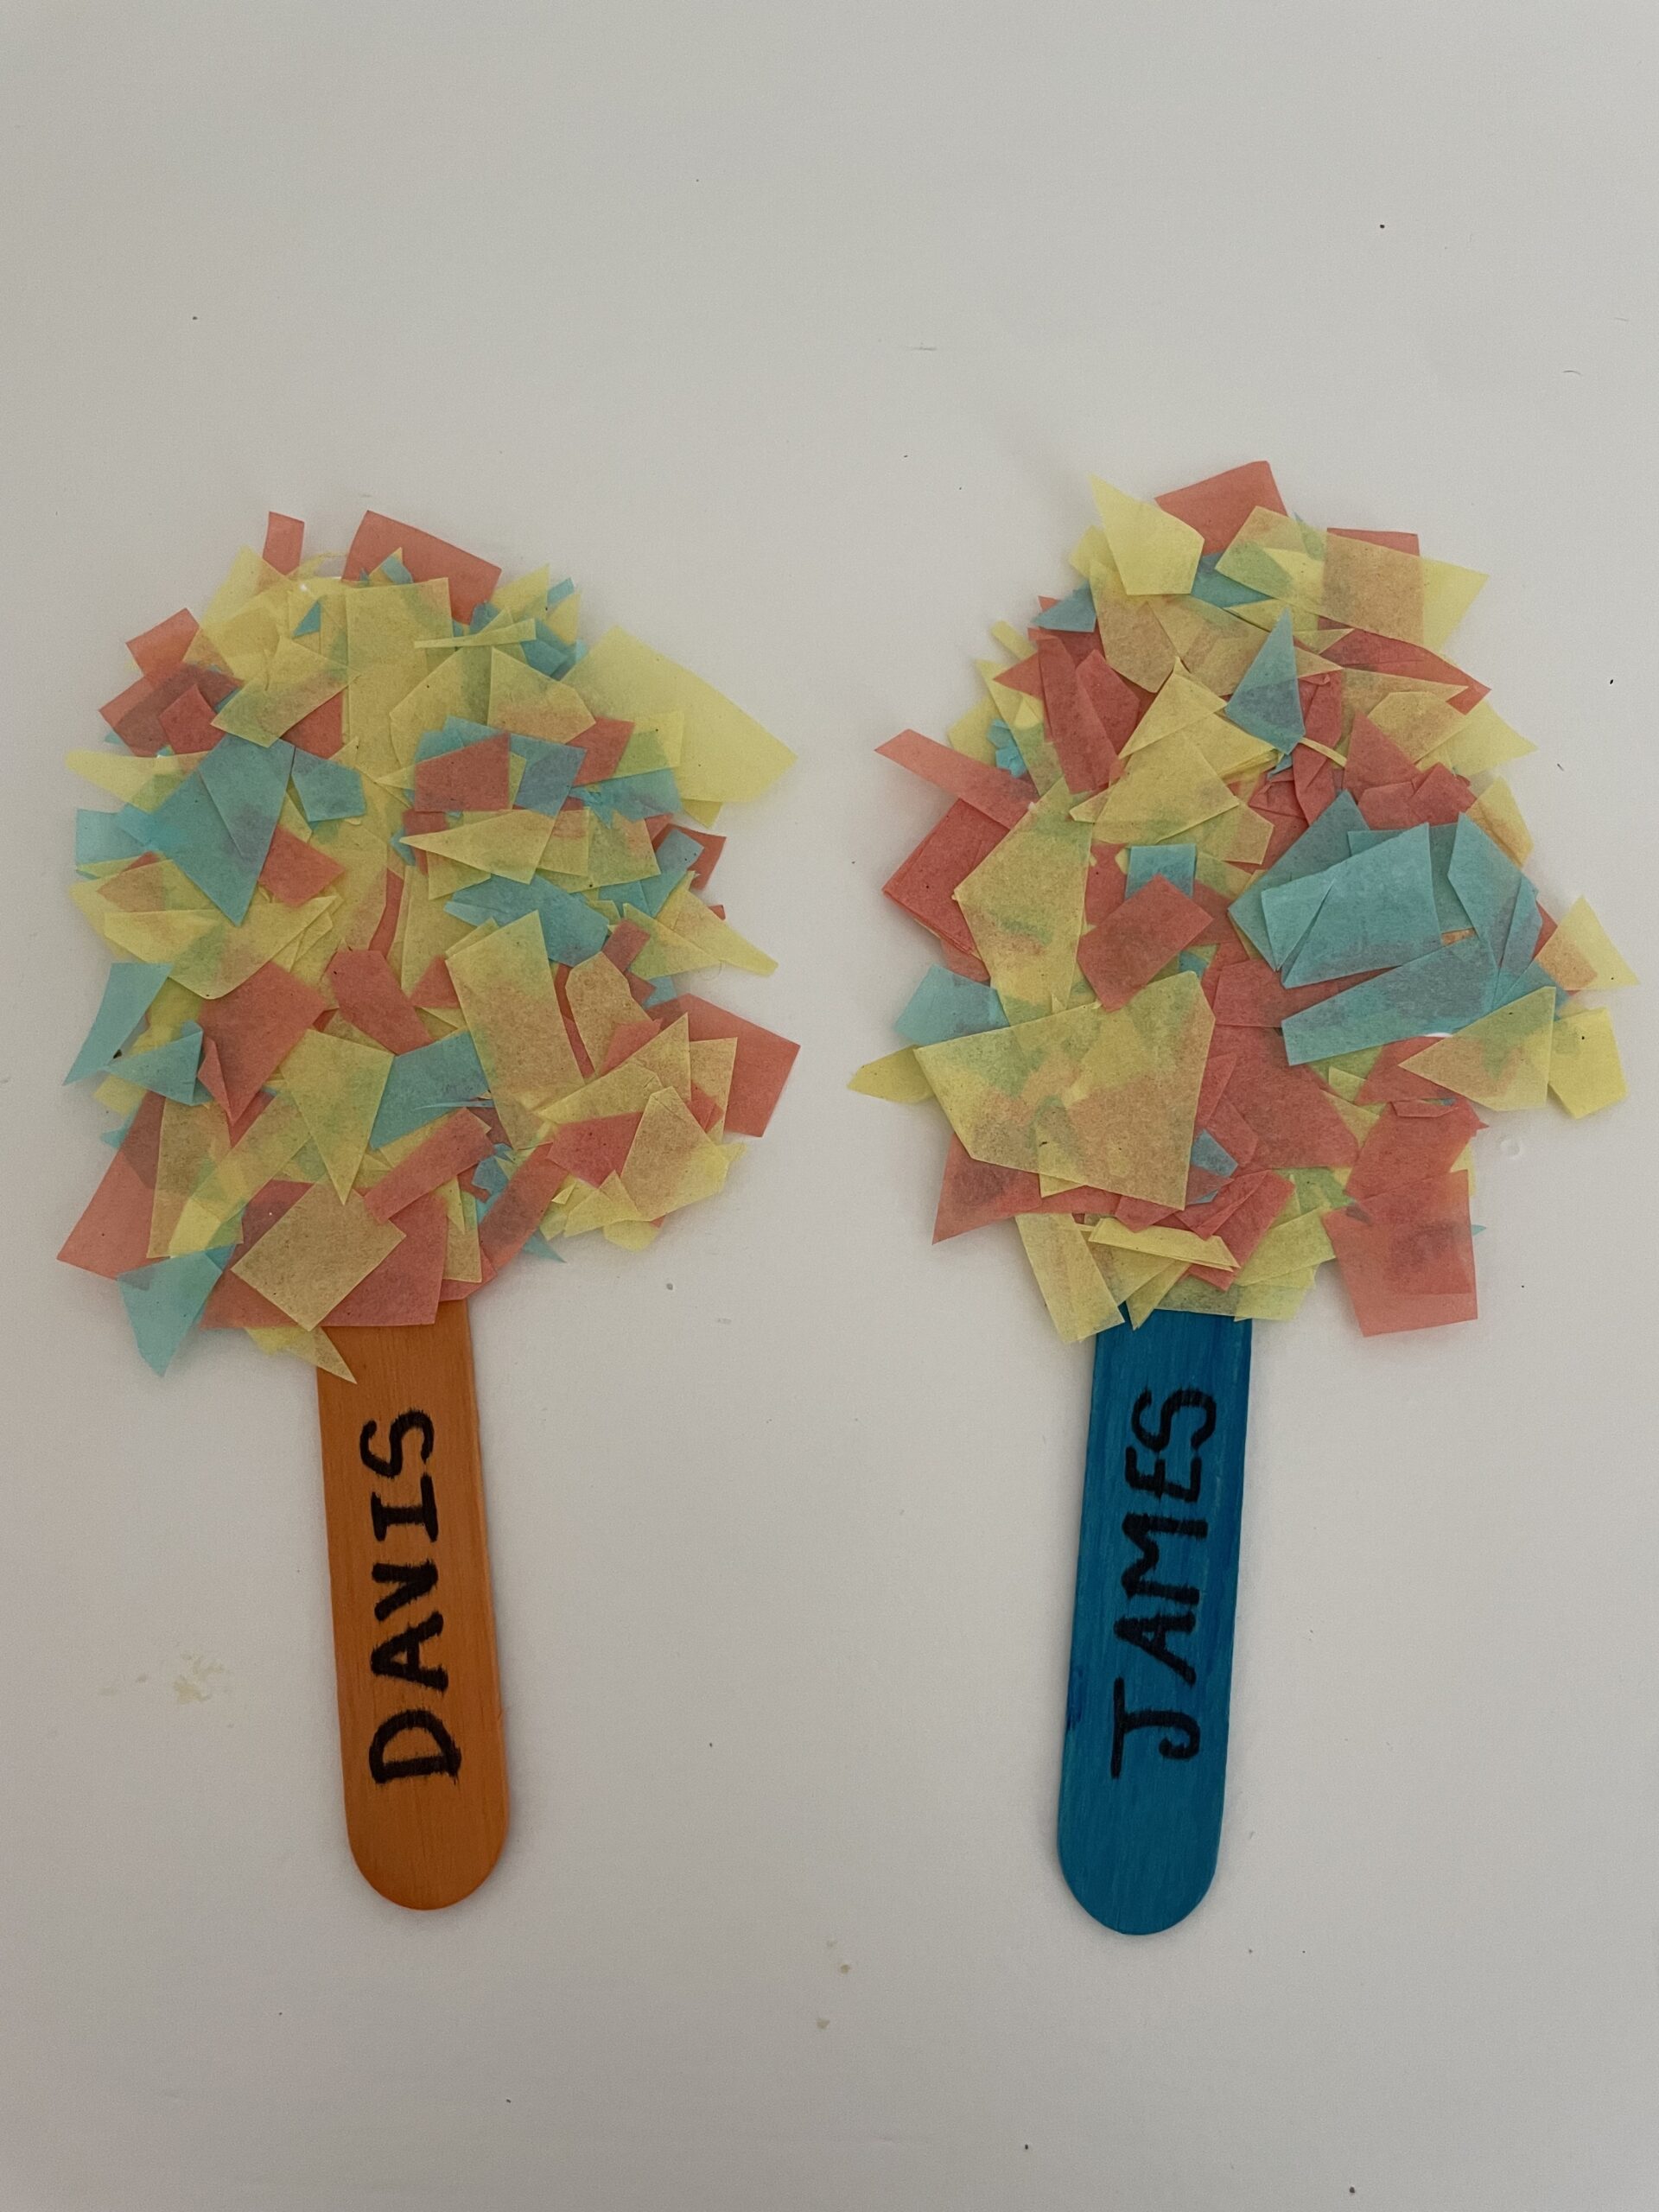
Tissue Paper Popsicle
Supplies:
- Colorful popsicle sticks
- Colorful tissue paper
- Cardstock
- Gluestick
- Pencil
Directions:
- First, cut tissue paper into small pieces
- Draw the outline of a popsicle on cardstock
- Cut out the outline
- Create a pattern with the glue on outline or randomly cover outline with glue
- Sprinkle tissue paper pieces all over outline until completely covered
- Leave to dry for about 30 minutes
- Finally, glue popsicle stick onto the back of the outline
- Give to a sibling or friend to brighten their day!
Tips:
- This craft will strengthen fine motor skills for your child
- You can teach colors & patterns through this activity
- This is a great option for a rainy day indoor craft
I hope these ideas spark creativity in your family & inspires you to create meaningful experiences with your little ones this summer!
Want to see more blogs like this and also get notifications on local events and happenings? Subscribe to our free weekly newsletters.