5 Easy, Cute & Useful Crafts
By Rachel Hoeing
Even if you aren’t an “artsy” kind of gal, springtime is a perfect time of year to get crafty because you can take the mess outdoors! I love art and I love for my children to use their creativity, but at the same time, I am not a big fan of crafts when you just don’t know what to do with the finished project. Know what I mean? You can only frame so many paintings and find so much shelf space for dinosaur sculptures. So in today’s blog I am sharing some fun, yet useful crafts that you can complete with children from ages 0-99. (Yes, because some of us are still children even at 99!) If your kids are too young to hold scissors, use the microwave, etc, for some of these ideas, remember that they are never too old to help choose colors, styles, etc! Exposing your children to arts & crafts at an early age is very beneficial!
Get crafty …
1. Flower Pots
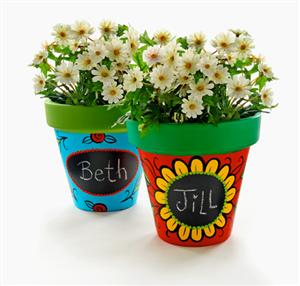
What I like best about this craft is that a baby can do it (seriously, dip their feet in paint and put footprints on the pot) or teenagers can do it (they love to show their personalities through art). I searched online for some of the most creative painted pots. Below each photo is a link where you can see instructions.
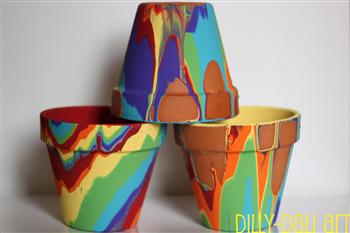
Rainbow Pots from Dilly Dally Art

Stylish Pot from Life on the Balcony

2. Personalized Journals
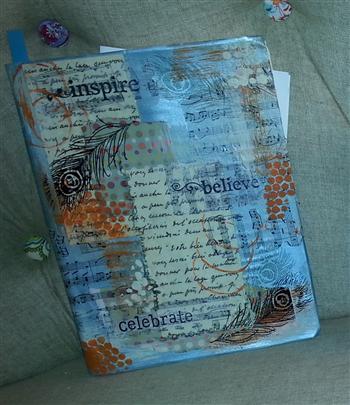
You can utilize two forms of art in this craft because after the craft is complete, your children can continue to explore their creativity through writing. Your young child may choose to use it to draw pictures of his favorite things. Your older child may use it to begin a diary or daily journal. Your teenager may use it for poetry. Pictured below is a journal I decorated myself in my Art & Soul Workshop. For this one, I simply used a basic composition journal. You can find these at the Dollar Store. I then chose different pieces of scrapbook paper, paints, stamps, and tissue paper. I attached these using the decoupage method. When you decoupage, simply put a thin layer under and over each piece of paper you put on the journal.
3. Memory Boxes
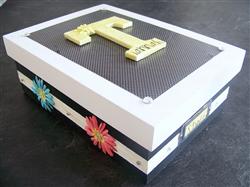 These can be decorated in the same way as the journals by using decoupage. You may also choose to paint the boxes, color them, use appliques, etc. My kids each have a Memory box that holds many different things. They each have one that is fairly large, and in these we put photos, special papers and projects from school, ribbons from sporting events, pins, medals, report cards, special souvenirs, etc. They also each have a smaller memory box where they keep items and notes from their grandparents who have passed away.I would suggest purchasing a basic box from an arts & crafts store. You can often find wooden or cardboard options. Then you can let the children use their own imaginations to decorate! I found the example above on the blog “Art, Middle Age and Other Grey Areas.” You can see instructions on how to make a similar one here.
4. Fun Soap Bars
 The cool thing about making soap is that you can make these all year long to correspond with different holidays and seasons! Simply purchase soap molds (I know they carry them at Wal-Mart) and follow the directions below! They will sell molds year-round in different shapes and sizes. So much fun for the kids! You will need:
Wilton Silicone molds
Microwavable Measuring Cup
Melt & Pour Glycerin Soap (buy at craft store)
Food Coloring
Fragrance Oils (optional)
Take 1 – 2 ounces of melt & pour soap and cut into small pieces. Place in measuring cup. Microwave for about 1 minute or until soap melts. Add a drop or two of food coloring and ½ teaspoon of fragrance oil. Stir and pour into silicone molds. Let the mold sit until soap solidifies. When it is a solid, pop the soap out of the mold!
5. Fleece Blankets
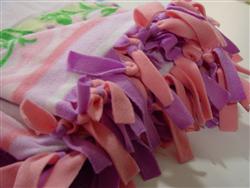 I am sure you have seen these many times before. We personally own five of them due to the fact that my mom went on a blanket-making frenzy one year! The best part about these blankets is that kids can customize them to fit their own personality. Take your kids to the fabric store and let them choose two pieces of fleece. You can cut these to any size you choose. Make a small blanket for a doll, a medium blanket for nighttime, or a large blanket for snuggling in the den.
I found many “how to” blogs on Pinterest, but the one from “Life Over Easy” was the most simple and included photos so you can see step-by-step instructions. As long as your child can cut a straight line, he can do this craft! Here is the blog with instructions.
Have fun getting crafty!

