Companion Gardening Three Ways
By Guest Blogger Ashley Quinn Kibby
When we moved to North Carolina from Michigan in 2019, one of the Southern-living perks I was most excited about was the long growing season. Compared to Detroit, where it snowed on my twins’ birth in mid-April, Greensboro offered at least two additional months of gardening, which offered me ample opportunity to test my green thumb. I learned companion gardening in three ways.
The first year we lived here, I planted a beautiful perennial shade garden with hostas, astilbes, ferns, azaleas, and hydrangeas. I’d never bothered with annuals up North but that year I also planted begonias in the summer and pansies in the fall, which together colored my garden for over six months!
That first year with two one-year-olds, gardening offered me the chance to clear my mind, move my body, and create beauty around me. While you might not think that taking care of many additional dependent life forms would be comforting to a new mom, the connection with nature offered me true solace during an otherwise stressful time. This year, I decided to take the healing power of gardening one step further by growing vegetables that would also nourish my family.
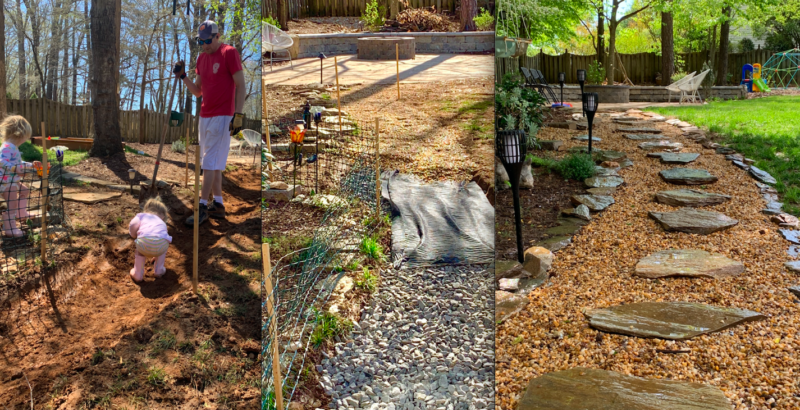
While tending to my flower garden was mostly a solo act, the theme of our raised-bed vegetable garden turned out to be Companionship! Not only would our herbs and veggies need to be planted in specific groups to best control for pests and productivity, called “companion gardening,” but we were also fortunate to stumble upon a companion landscape project — a stone pathway which doubled as a drainage solution. By digging the pathway at the same time as the garden beds, we were able to use the dirt we displaced for the path to fill the two-foot-high planter beds!
The third component of the companion theme was my dutiful digger, stone spreader, and life partner turned landscape companion, Mike. As you may have gathered, productivity has a certain pull on me, which can also have a certain push on my marriage! While I love a deadline because it motivates me to get the job done, Mike hates it for the exact same reason. So, it was with a cautious eye to the calendar that Mike agreed to help me realize my landscaping dreams, knowing that we had less than one month to complete the projects before our family road trip to Michigan.
The fact that I’m writing this blog from the passenger seat of our SUV — two toddlers and Cocomelon singing in the rear — means that our mission was a success! Not only did I plant two of the four beds the day before our departure, but by happy accident, I also planted them biodynamically on the Full Moon. (It’s thought that sowing seeds during this Moon cycle helps them swell and absorb more water for germination!) As always, time will be the judge of their growth, but until then, I wanted to share the steps we took to get to planting day:
- Digging the Path
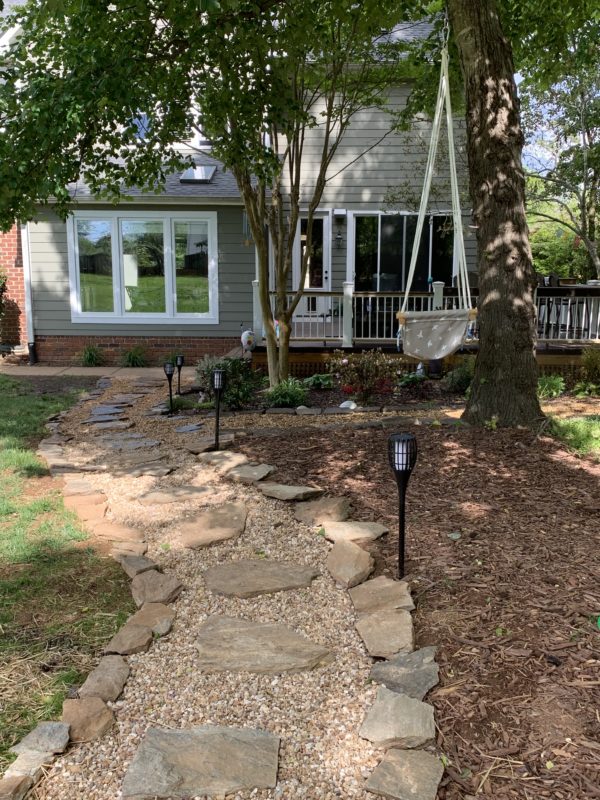
First, we marked the width of the path every five feet with wood garden stakes to ensure an even trail. Then, we dug a swale about eight inches deep in the center with the edges a little higher. We rented a U-haul pick-up truck for $20 to pick up three loads of stones and laid the first scoop of 1-inch gravel along the center of the path to allow ample space between rocks for the water to flow through. Above the gravel, we rolled out weed mat so the smaller stones wouldn’t settle into the larger ones below, and then we spread the decorative 3/8” stone mix above that — two truck-loads worth! The large steppingstones and borders were the final touch, and all that dirt we displaced — you guessed it — into the wheelbarrow and dumped near our garden plot.

- Creating the Garden Plot and Prepping the Beds
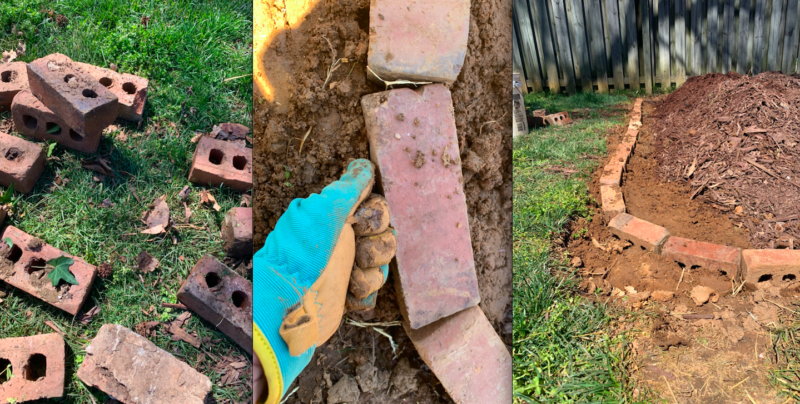
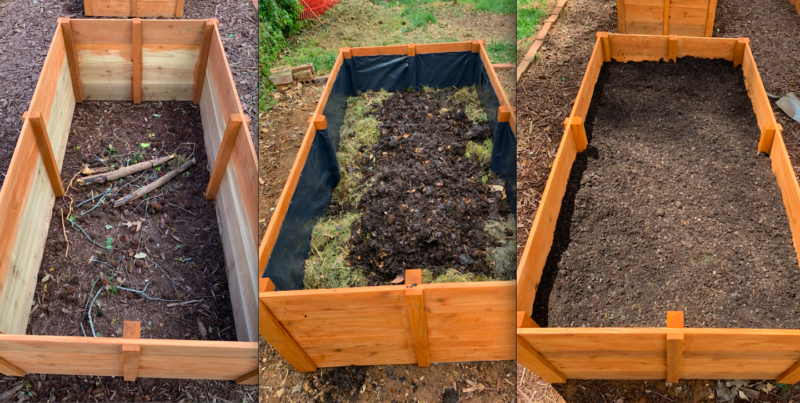
We didn’t have as much dirt as I thought we would to fill the beds, since we used at least half of it to level the slope of our plot. After the slope was level, I used some old brick we had in the yard to make a border. It was messy, but useful, to do this work after a heavy rain, as the mud served as mortar to hold the bricks in place. The remaining clay went into the raised garden beds, but only after we filled the very bottom with bulky organic matter including twigs, spiky Sweetgum balls, grass clippings and fall leaves. Then we mixed the clay with garden soil and compost before adding a final four-inches of no-mix organic garden soil at the very top. Over time, all of the organic material in the bottom of the bed will make fertile soil for years to come!

- Planting and Maintenance
We started all of our organic seeds outdoors after the last frost. In one 3×6 raised bed, we planted carrots, bell peppers, cilantro, mesclun greens and green beans; in the second we planted strawberries, two varieties of tomatoes and three types of onion sets. While I’d researched companion gardening, I deviated slightly on planting day to prioritize the foods that our family favored and those that required the longest time for harvest, since we’d be in Michigan for nearly a month. The last step was to set up the sprinkler on a watering timer, which I programmed to water daily at 8am. When we return home, I hope to have some little plants to thin out and provide stakes and cages for the green beans and tomatoes.

As with most of my projects, the veggie garden will undoubtedly be an exercise in trial and error, and that’s okay because that’s how we learn! I believe gardening is particularly healing and nourishing because it requires you to pay attention, stay in the moment, and respond mindfully to what nature throws your way. By no means am I an expert, but I’ve definitely learned that the land, like life, benefits from systems-based thinking with the goal of creating balance. Give a little here, take a little there, and always make time to step into the sunshine with your favorite companions.

Want to see more blogs like this and get notifications on local events and happenings? Subscribe to our free weekly newsletters here.
If you like this blog on Companion Gardening You Might Like These Too:
Raising Environmentally Aware Children
Our Favorite Products for Around the House
Day Trip Idea: All-A-Flutter Butterfly Farm
